

We carved pumpkins as a family for the very first time in many years! It used to be a family members custom, for the 13 years we lived on a cul-de-sac and bought above 400 trick-or-treaters every calendar year. But then we moved and now we really don’t even get one particular customer on Halloween night time.
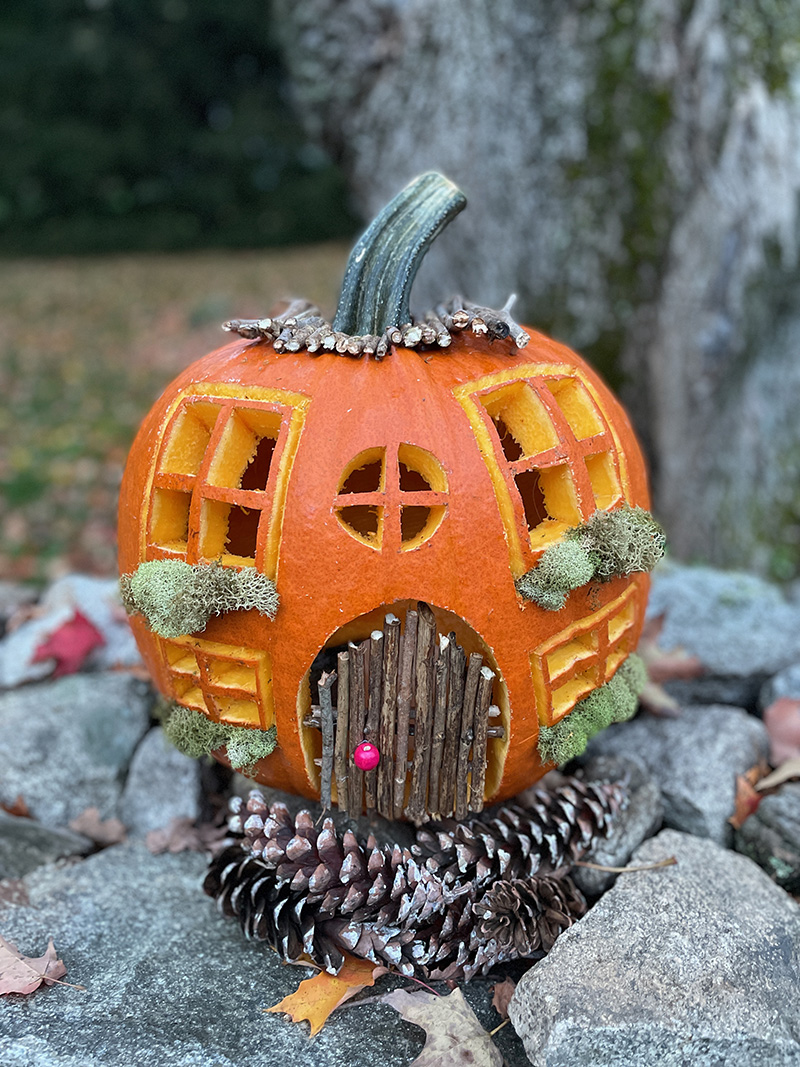
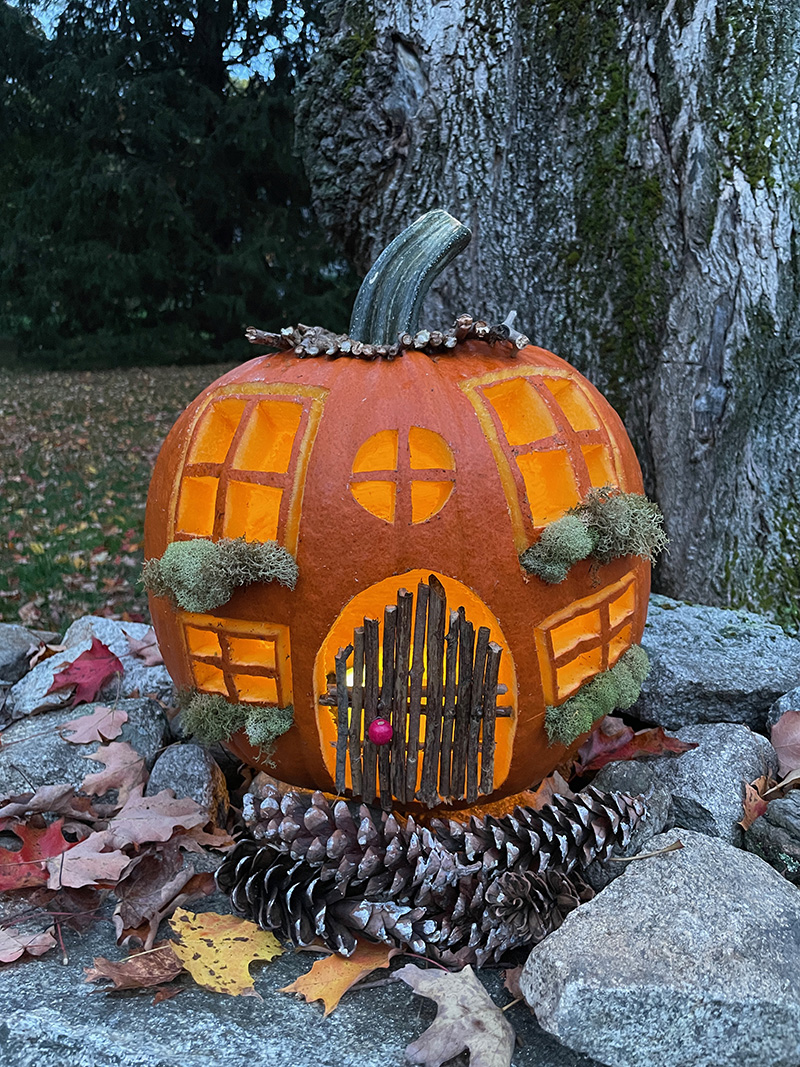
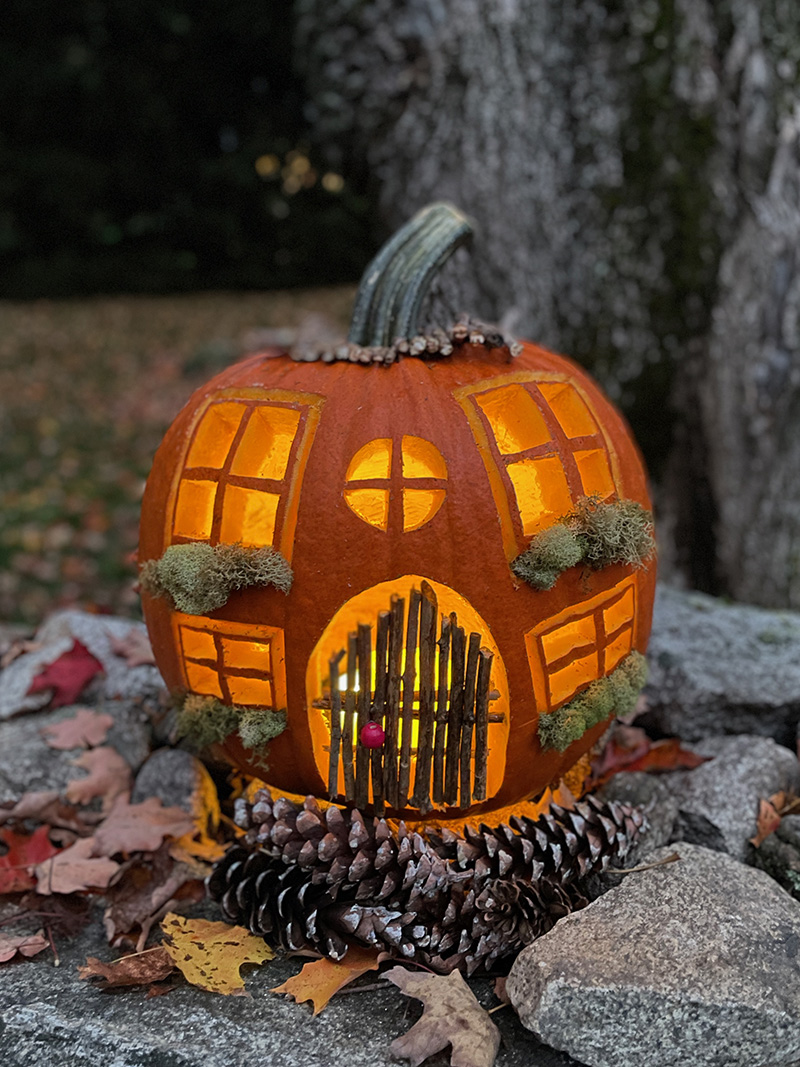
This weekend, although, our carving mojo arrived back again and we resolved to invest a total working day producing some pumpkins for our stone wall. I experienced an notion for a pumpkin cottage and it virtually took me all day. Not that it was really hard to make, just a good deal of demo and mistake. And finding twigs and all the other components. Enable me notify you and demonstrate you how I built it…
[ I am a participant in affiliate programs designed to provide a means for bloggers to earn small fees at no cost to you by linking to Amazon.com and affiliated sites. ]
Provides desired to make a pumpkin cottage:
~ Pumpkins (medium to large are really less difficult to carve)
~ Butcher knife
~ Carving applications (quite a few grocery merchants carry carving sets like this – make certain they are sturdy!)
~ Twigs & scorching glue gun for door
~ Moss for the window containers
~ Candles (we used electric this 12 months for the reason that wax candles had been so costly. I requested these and so significantly so good. They arrive with a distant which actually allows. I utilised 2 candles for every pumpkin)
How to carve a pumpkin:
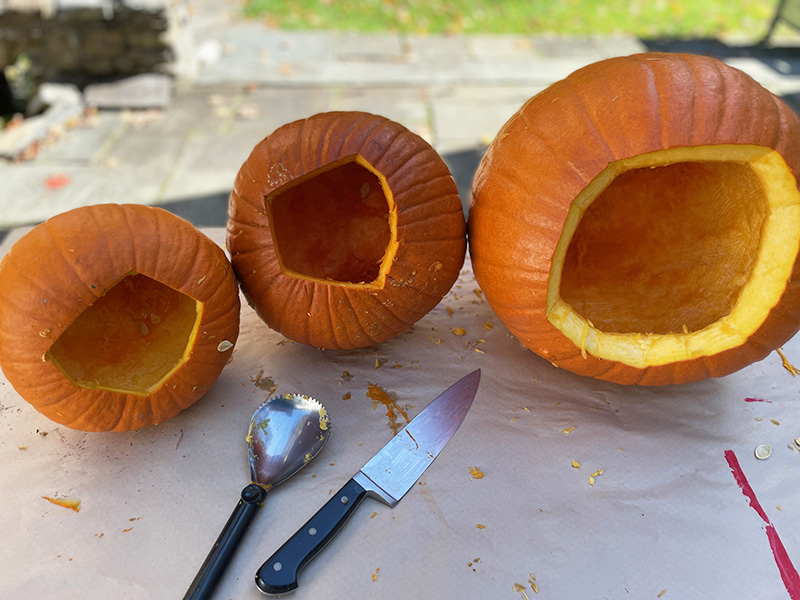
1. Slice open up the bottom. We like to do it this way so that the stem isn’t disrupted, which actually makes the pumpkins final longer.

2. Scrape out the insides. Save the seeds to roast afterwards! This section is yucky (to me), it feels like guts. Which it is. My husband does this section! He then scrapes the side that I’m going to carve much more than the rest so the layer is a minimal thinner to reduce by.
How to make a pumpkin cottage:
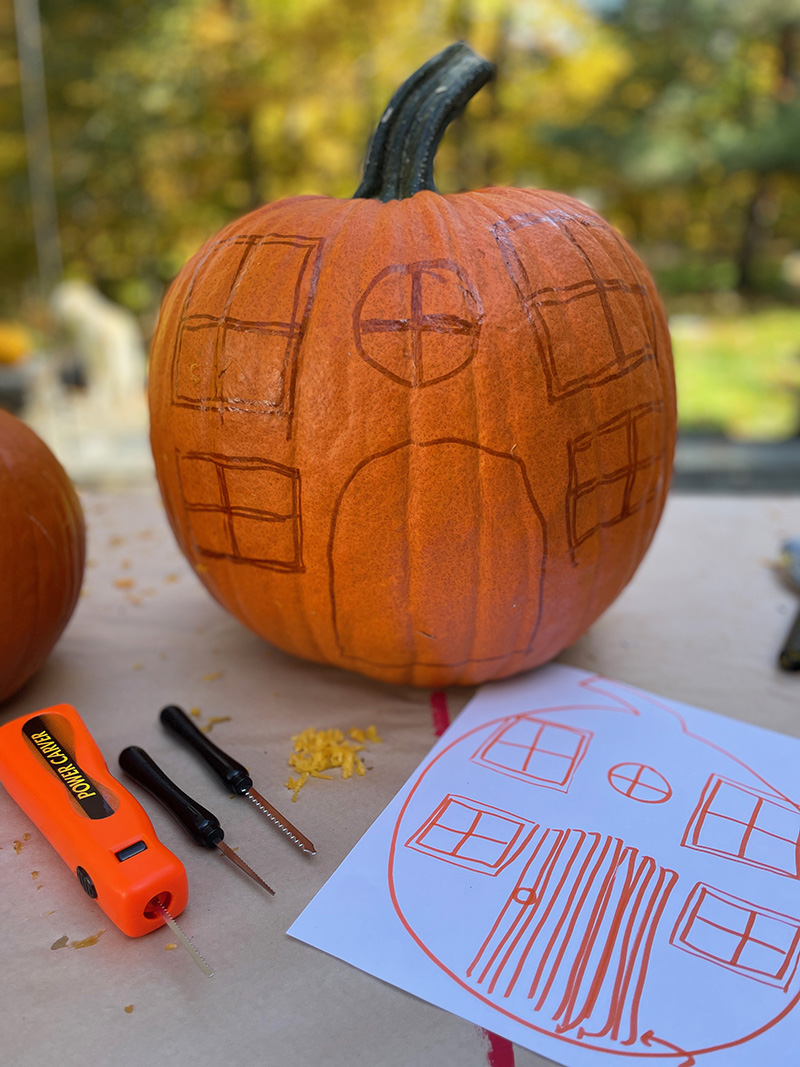
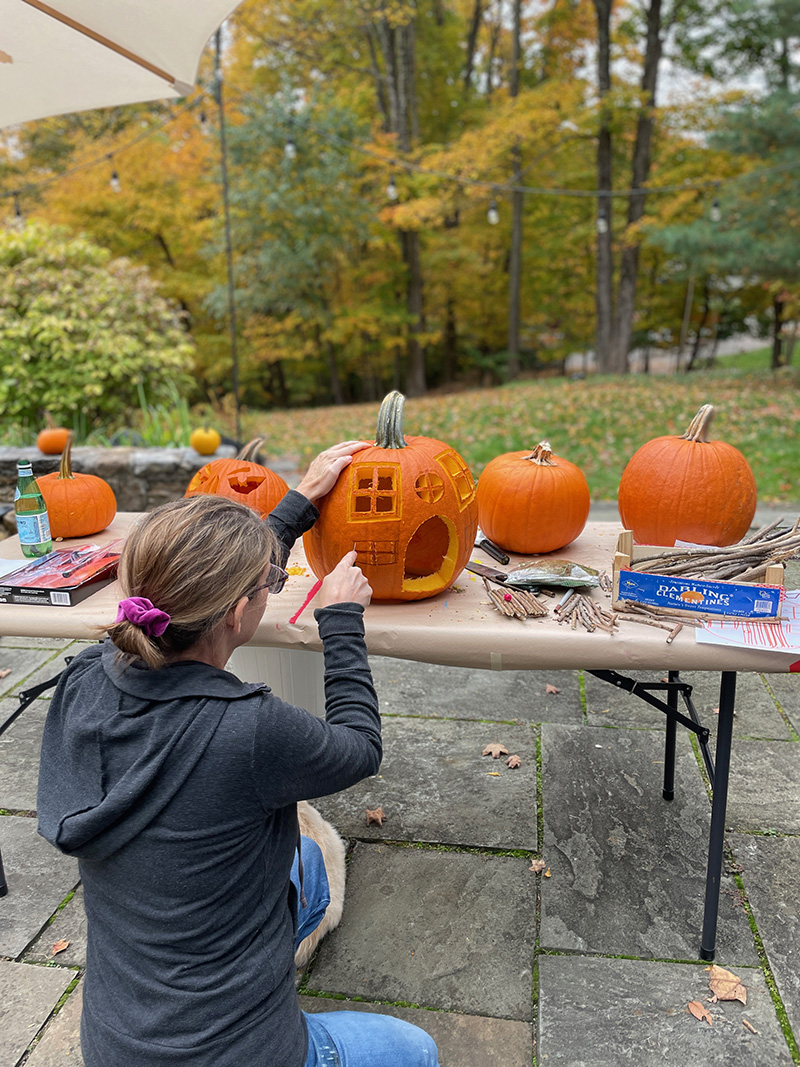
1. Start by drawing your idea on paper.
2. Applying a washable marker, sketch on to your pumpkin. I erased a whole lot, and also erased as I went, relocating windows all over and altering doorway designs. You just want a moist paper towel to wipe off the marker.
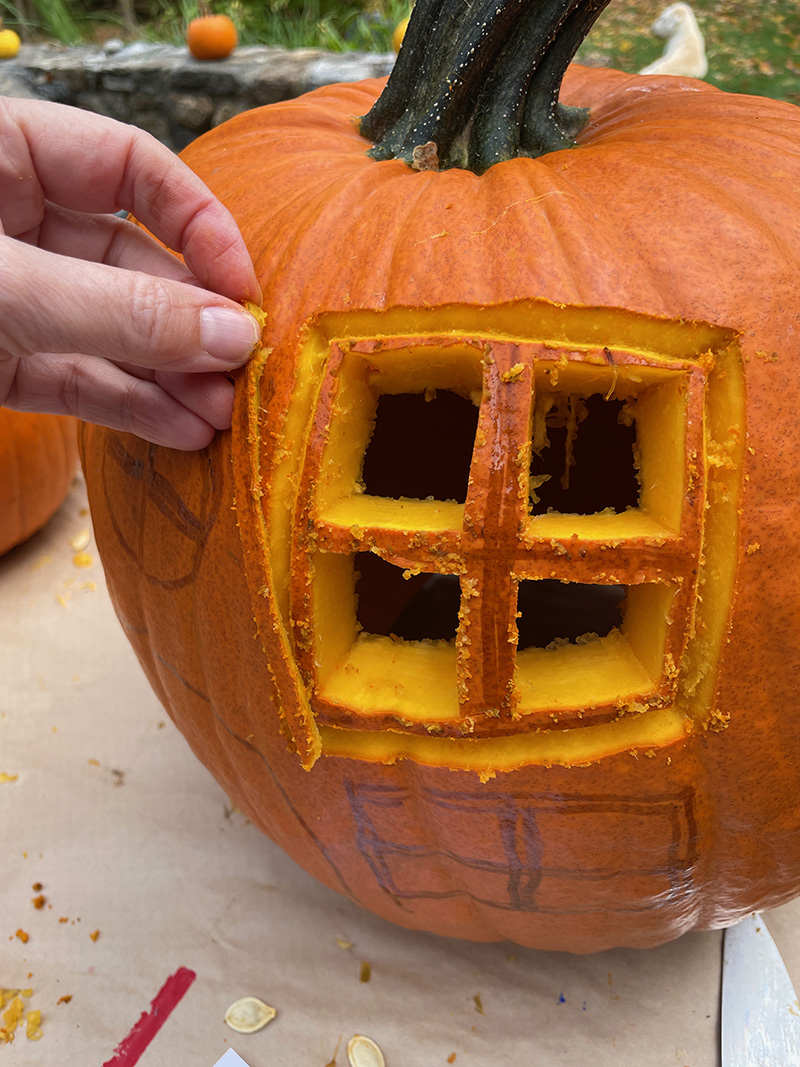
3. Slash the windows, then slice small wedges (slanting the tiny chopping device to make a “V”) for the molding.
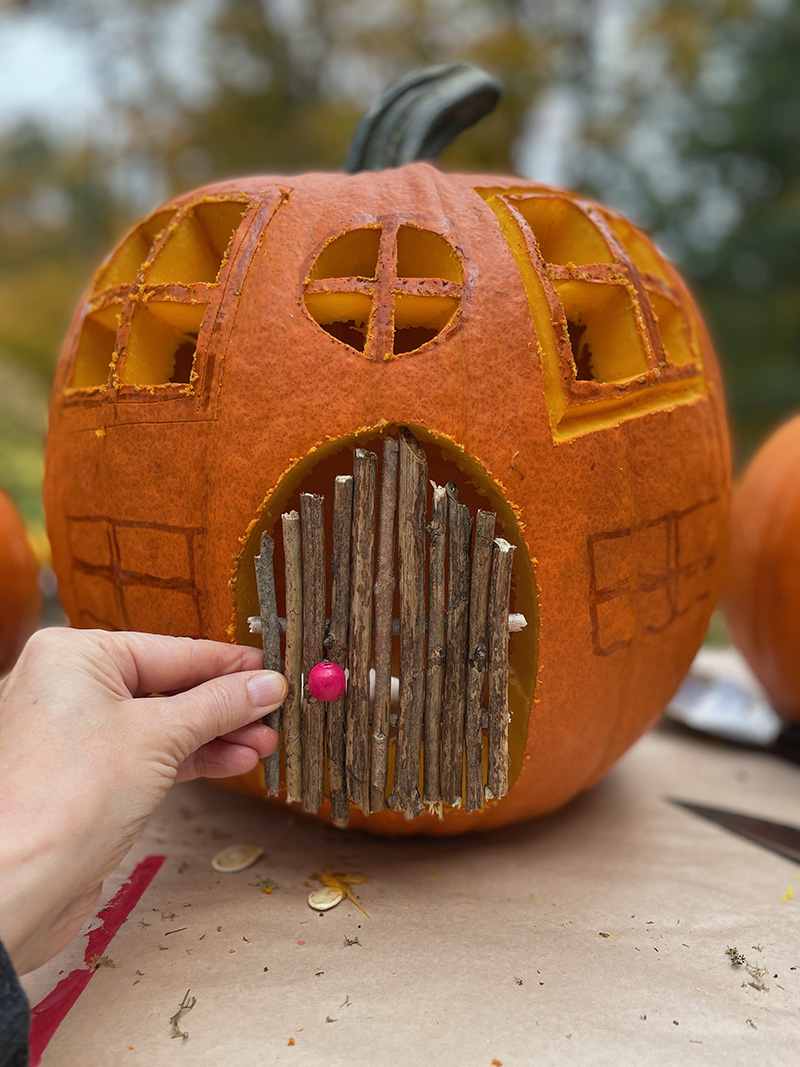
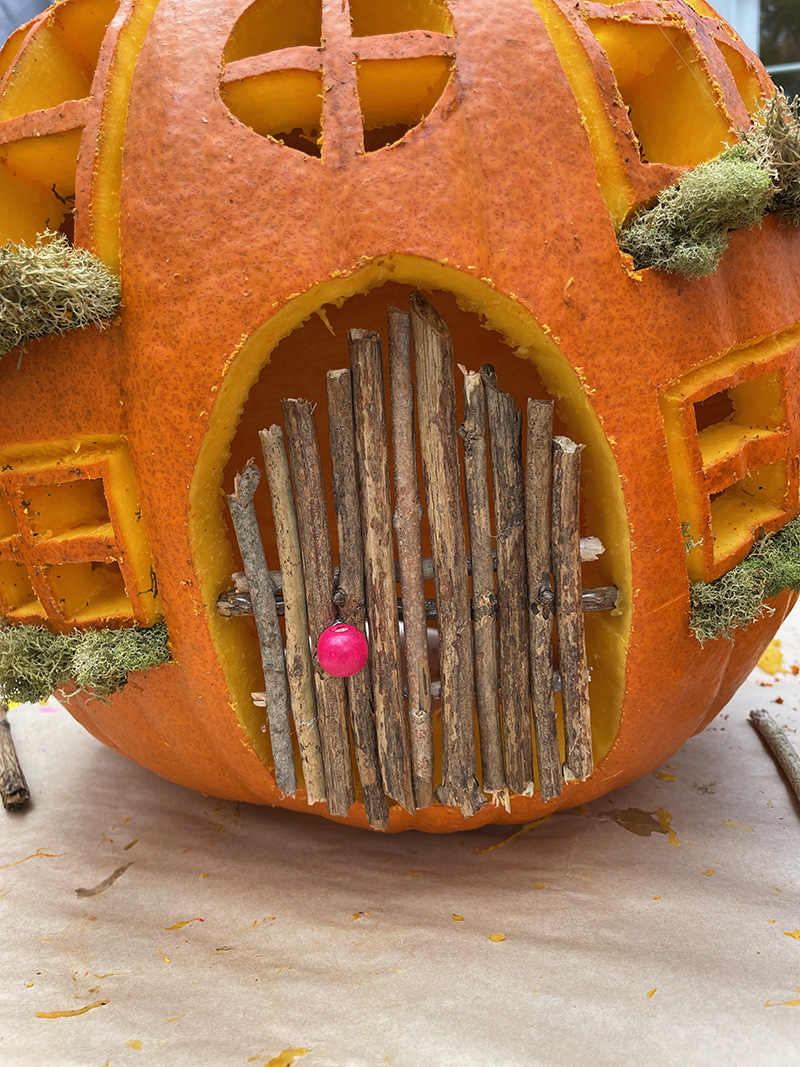
4. Make a door from twigs employing a warm glue gun. I utilized a bead for the doorway deal with. I essentially manufactured the doorway initially then held it up and traced close to it to make a shape a bit greater than the doorway.
5. Lower out the doorway form.
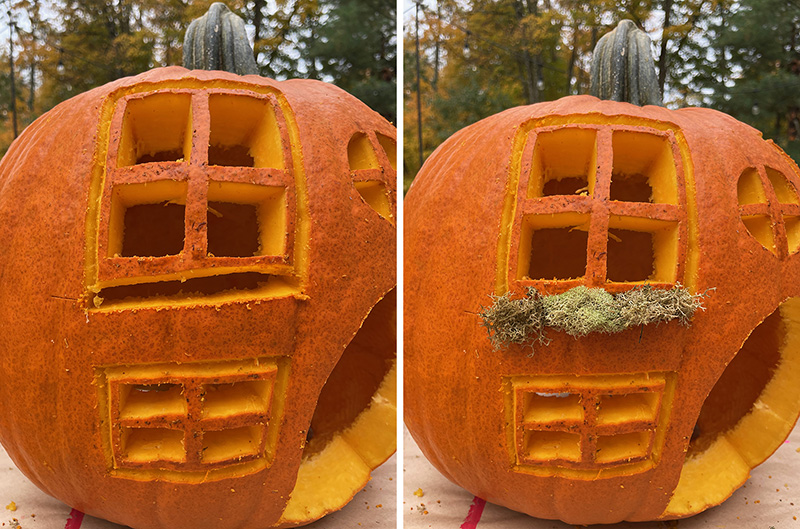
6. I assumed a large amount about how to make the window boxes, and resolved to slash all the way by way of and things the moss in the crevasse. This seemed like the ideal way for it to keep in place for a couple months.

7. To attach the door to the pumpkin, I made the decision to wedge a stick in the sides and then warm glue the door to the stick.
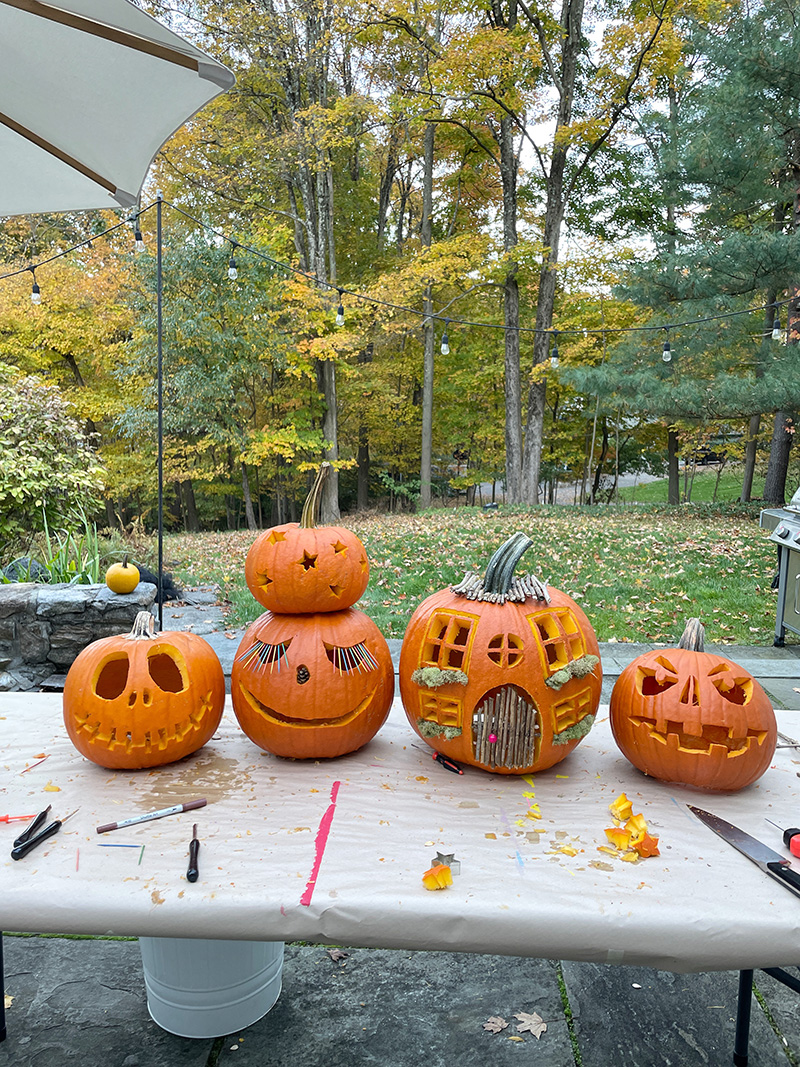
My young ones aided make the other kinds! The stars were being made by tracing a cookie cutter.
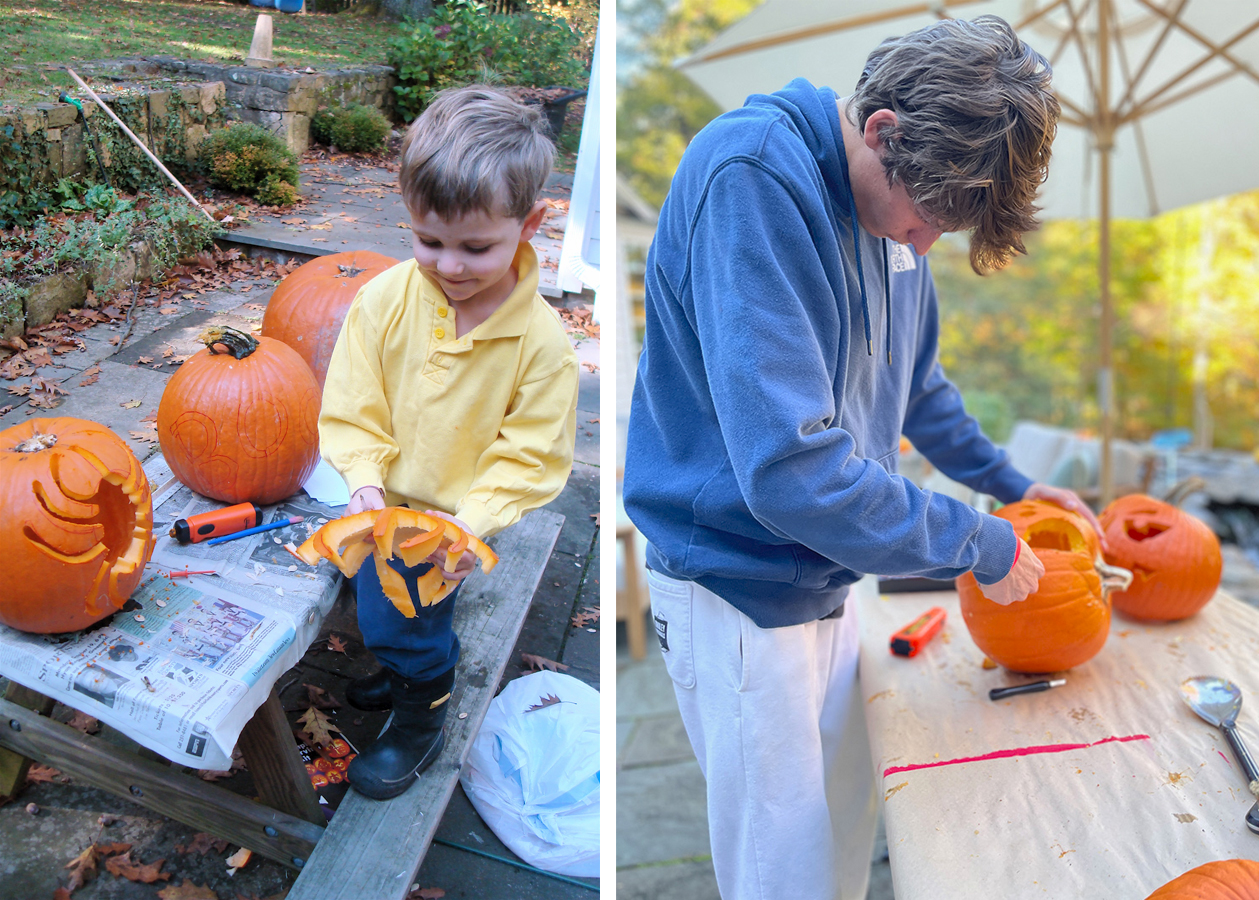
In this article is sweet Nate as a 4yr outdated and a 16yr old… nevertheless loving carving!
We positioned them on our stone wall in the entrance of our property. I will report again how prolonged the electric candles past!
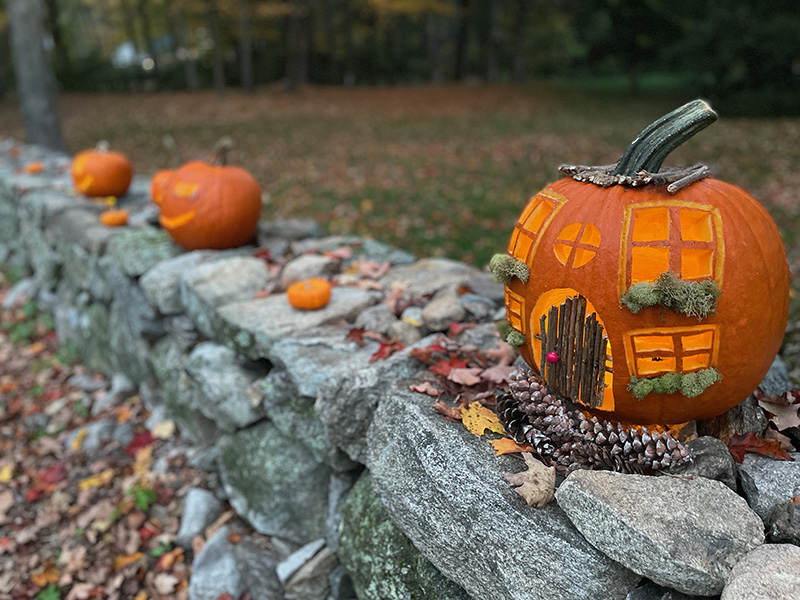
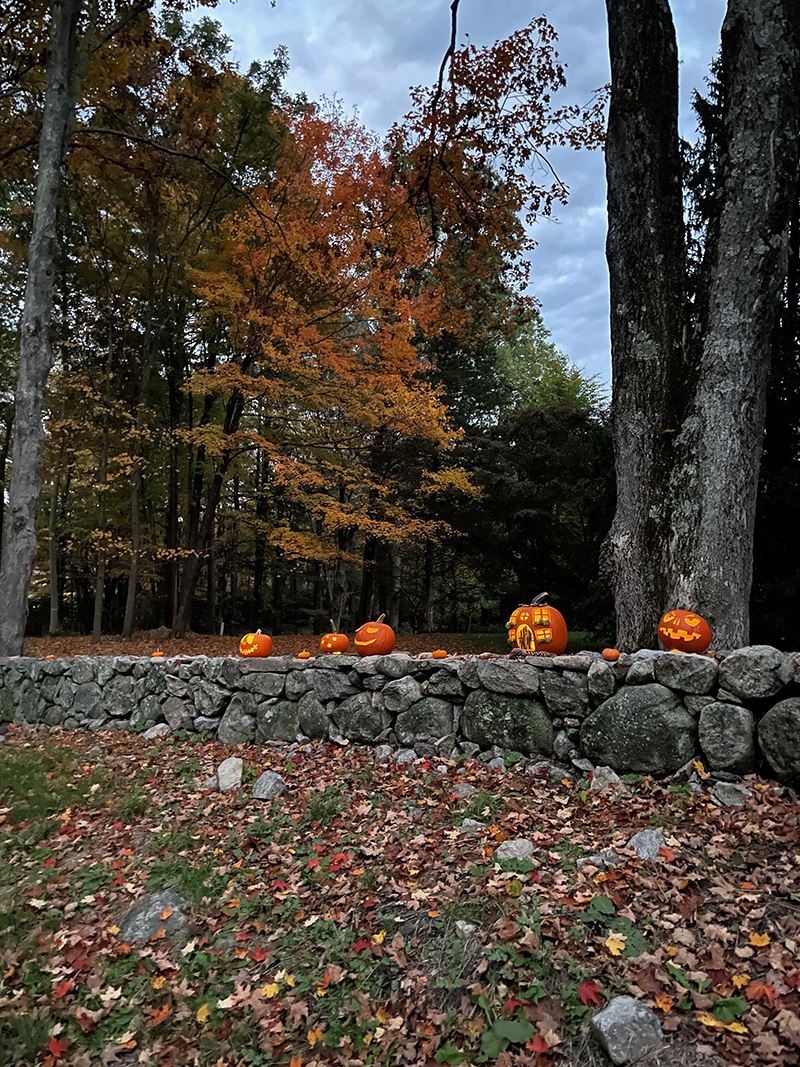
This picture I really took when it was virtually dim. The new iPhones are rather remarkable in catching the mild!
xo, Bar
– – – – – – – – – – – – – – – – – – – –
Did you like this write-up? Listed here are more Halloween decorating ideas:

25 Imaginative Halloween Decorating Strategies
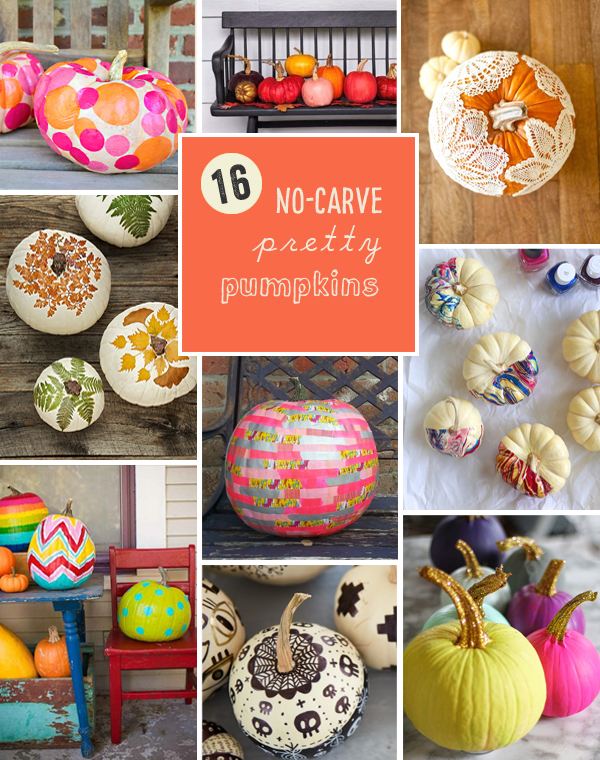
16 No-Carve Pumpkin Thoughts


